

Meters in the portfolio view left sidebar. The sections below follow the order you use in the product: review the main page, filter the table, map or assign meters, edit properties in batch, create virtual meters, then manage linked meters.
For meter detail at a single site, switch to the building view and open Building meters.
Meters page
The portfolio Meters page is one workspace for browsing meters, editing properties, and mapping meters to buildings and spaces.Workspace modes
Page actions
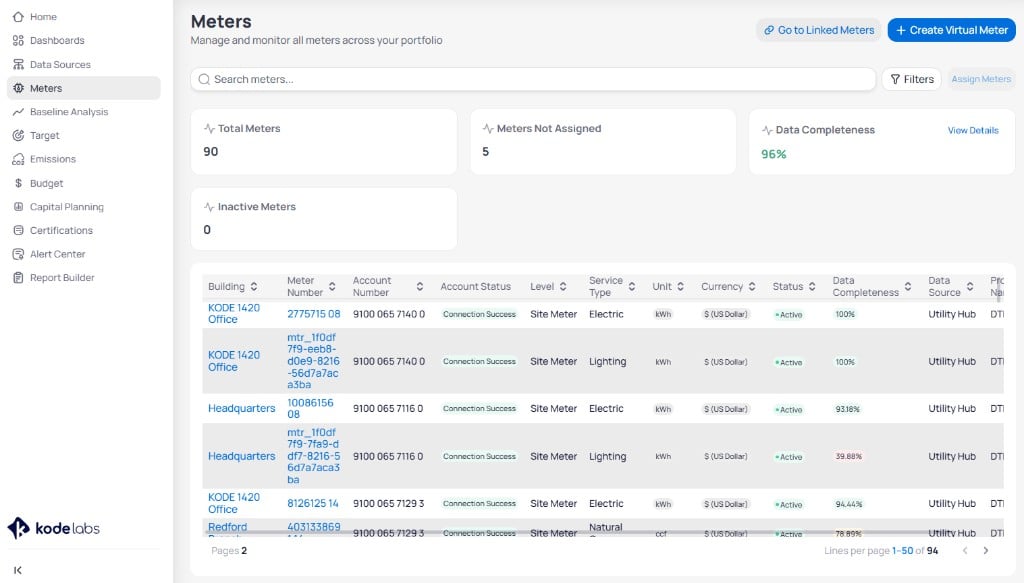
Portfolio Meters page with summary cards, filters, and the meters table
Summary cards
Four cards summarize portfolio health above the table.View Details on Data Completeness to open a drill-down by building, account, and month. For how EnerG scores coverage and why gaps matter, see Data completeness.
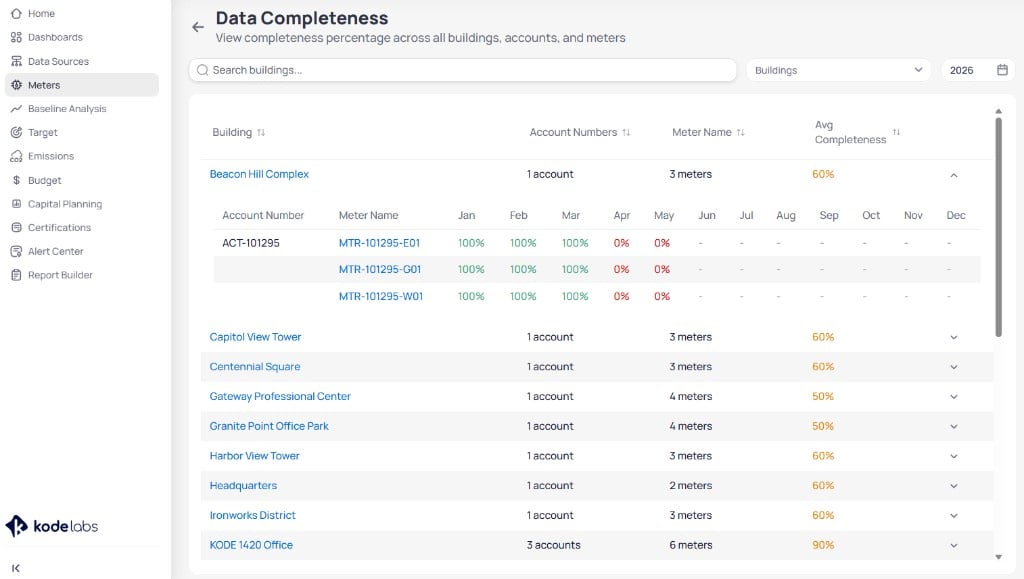
Data Completeness page with expandable building rows and monthly percentages
Meters table
The table lists every meter in the portfolio. Each column header supports sorting. Use pagination at the bottom to move through large result sets. Click a Building or Meter Number link to open Building information or meter details. For what each column shows, see Meter table columns.Filter meters
Use the search field above the table to find meters by number or name. ClickFilters to show the filter row. The button highlights when filters are active.
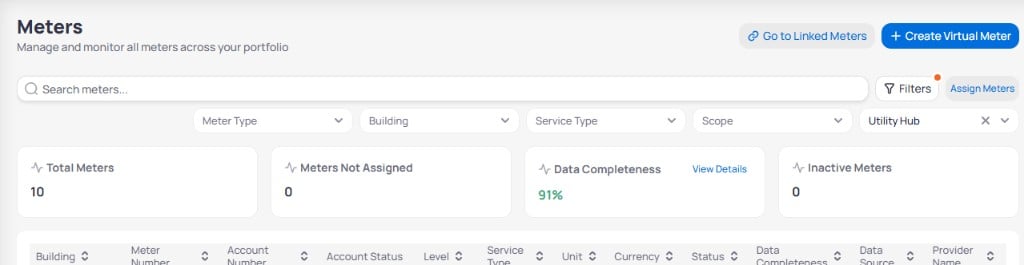
Portfolio Meters with the filter row open and Utility Hub selected as Data Source
Assign Meters becomes available.Assisted mapping
Assisted mapping recommends a building or space for each meter. An authorized user confirms the relationship one meter at a time, for a selection, or for all eligible suggestions in the current filters. A high match score alone does not commit a mapping.Match score and evidence
Each suggestion shows a 0–100 match score, the candidate building, matching reasons, competing candidates, and clickable evidence. The score ranks available evidence. It is not a calibrated probability. EnerG builds candidates from normalized names and aliases, service addresses, geolocation, verified meter relationships, and provider or account references. After a building is resolved, EnerG can suggest a space when a suite or unit matches a unique space in that building. Statuses such as Suggested, Needs investigation, and Left unresolved help you track work that is still open. Mapped means the assignment is confirmed. Imported mappings without enough evidence show as Not scored.Approve mappings
Open Map meters
Meters, switch to Map meters mode. Apply filters so you only review the meters you intend to act on.Review each suggestion
Approve, assign, or leave unresolved
Excel and reference mapping
Download the filtered meter list with stable IDs and a building reference sheet. Complete mappings offline, then upload the results. You can also upload a provider, account, and meter list that already includes assigned buildings. EnerG detects headers and previews ready, blocked, unchanged, and skipped rows. Existing mappings stay protected. Duplicate or inconsistent identifiers are flagged. Building and space relationships are validated before changes apply.Batch update meter properties
In Edit properties mode, select individual rows or all filtered results across pages. Choose permitted fields and apply one change to many meters. The dialog shows mixed values, affected counts, and a change summary. Untouched fields stay the same. Clearing a field must be explicit. Each record is validated, and failures are reported. Before-and-after values are retained so you can reverse a batch without overwriting later edits. Meter fields can include account and provider details, service address, assigned building and space, lifecycle status, service scope, billing responsibility, and change history. Leading zeros in identifiers are preserved. Source-controlled fields stay restricted by permission. See the permissions reference forAssign And Unassign Meters and Edit Meters.
Assign meters to buildings
UseAssign Meters when you already know the building and want to pick meters from a data source. For scored suggestions and bulk approval, use assisted mapping in Map meters mode.
Use Assign Meters to link meters from a data source to a building. You filter by Data Source, open the workflow, pick the building, then select meters from that feed.
Filter by Data Source
Filters to show the filter row. Select a Data Source such as Utility Hub. Assign Meters stays disabled until you choose a data source.Click Assign Meters
Assign Meters next to the filter row. The Add Meters dialog opens.Choose a building and click Next
Next.The table lists Building, Type, and Address for each site.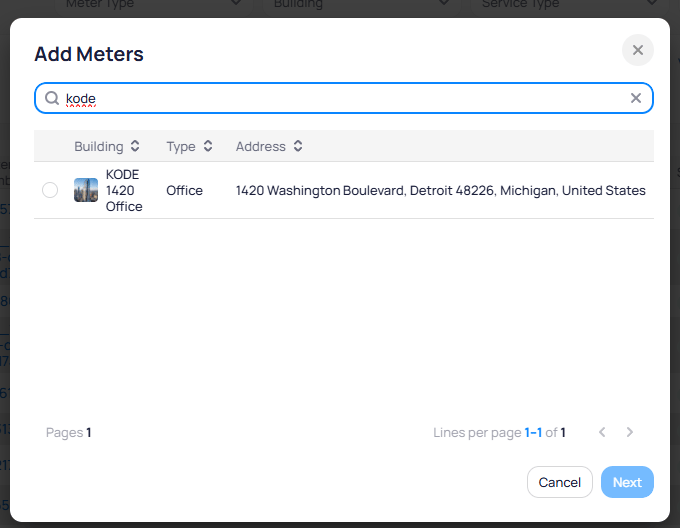
Add Meters dialog to select a building before meter assignment
Select meters and click Submit
Submit.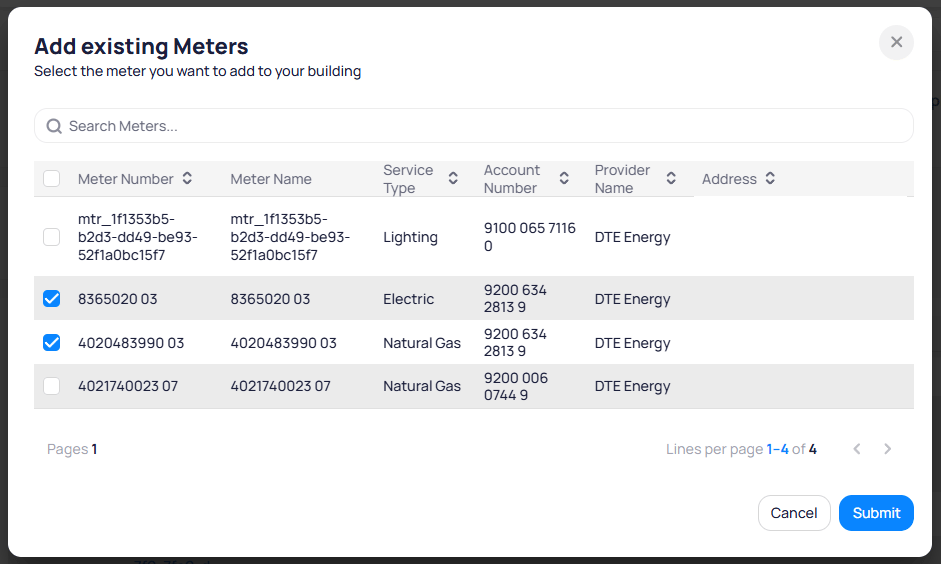
Add existing Meters dialog with selected meters ready to submit
Create a virtual meter
Click+ Create Virtual Meter in the top-right corner of the Meters page. calculate usage from other meters instead of a direct utility feed.
Choose a Calculation Method:
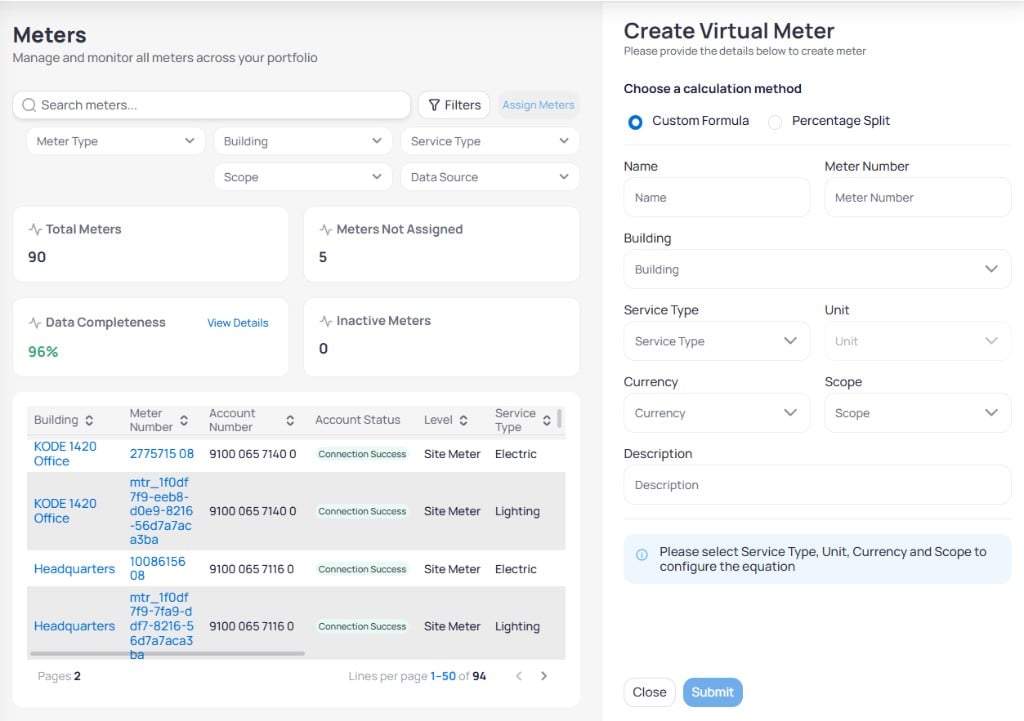
Create Virtual Meter with Custom Formula selected
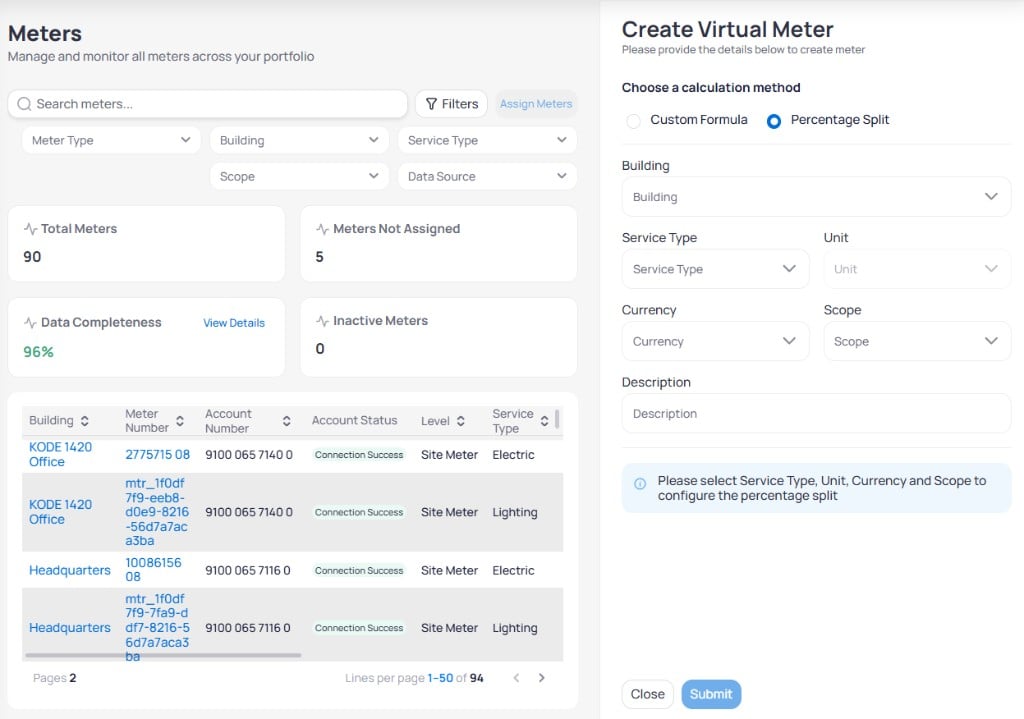
Create Virtual Meter with Percentage Split selected
Enter meter details
Configure the calculation
Submit
Submit. The virtual meter appears in the portfolio table.Linked meters page
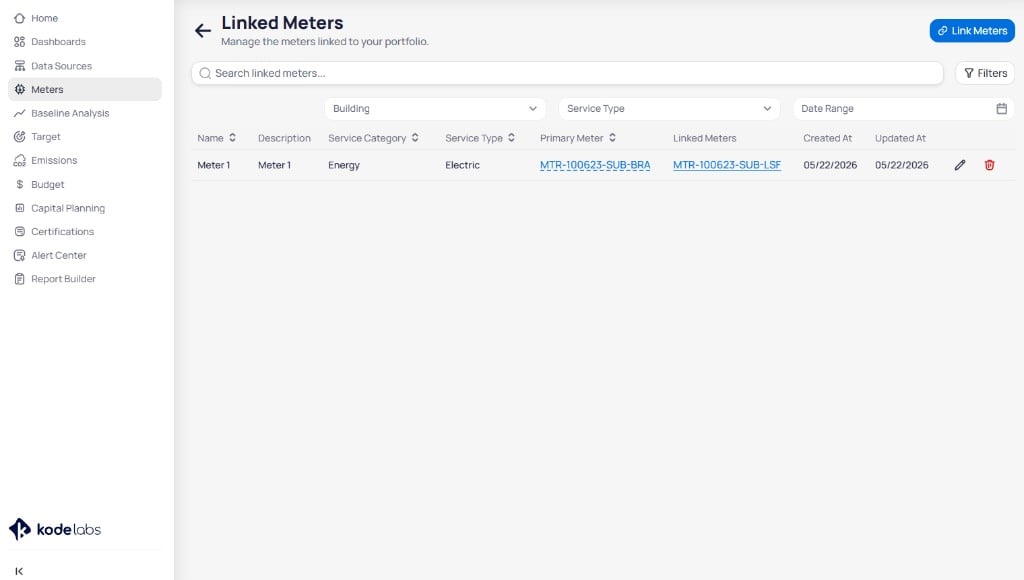
ClickGo to Linked Meters on the Meters page to open the Linked Meters view. The page title reads Linked Meters with the subtitle Manage the meters linked to your portfolio.
Linked Meters page with search, filters, and the links table
Filters to show Building, Service Type, and Date Range filters when you need to narrow a large portfolio.
Read link details
The table lists every meter link with sortable columns.Edit or delete a link
Use the row actions at the right end of each link.- Edit (pencil icon) — Open the Edit Meter Link modal to change the name, description, linked meters, or which meter is primary.
- Delete (trash icon) — Remove the link. The individual meters stay in EnerG; only the relationship is removed.
Edit Meter Link modal with available meters and timeline workspace
Open the link for editing
Update the link
Save changes
Update. The table refreshes with your changes.Link meters
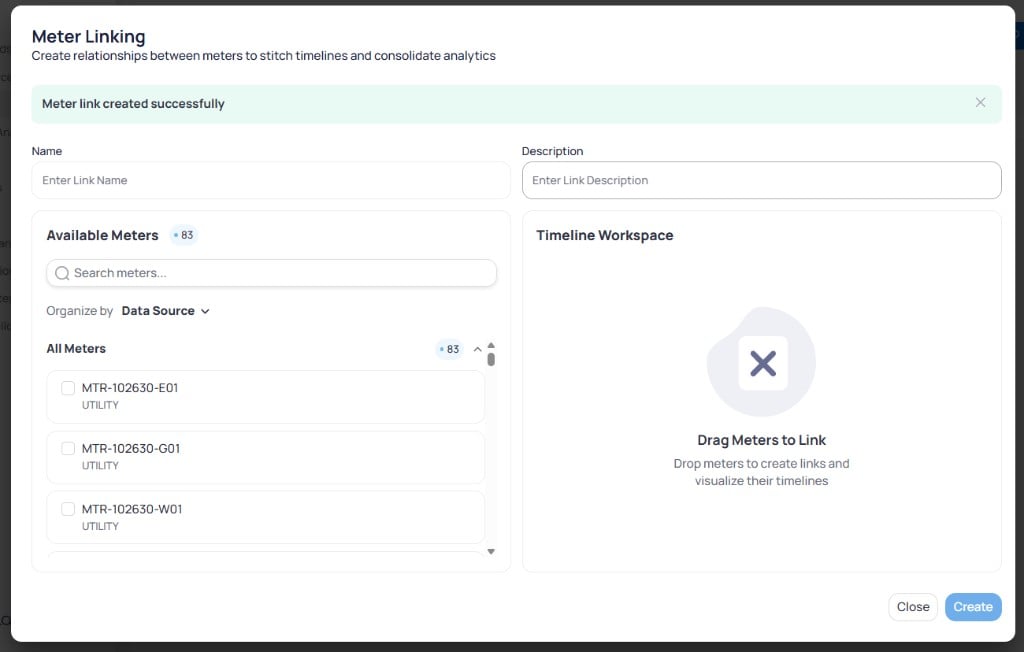
Meter links stitch timelines across related feeds so analytics stay continuous when accounts or meter numbers change. Create a new link from the Linked Meters page.Click Link Meters
Link Meters in the top-right corner. The Meter Linking modal opens.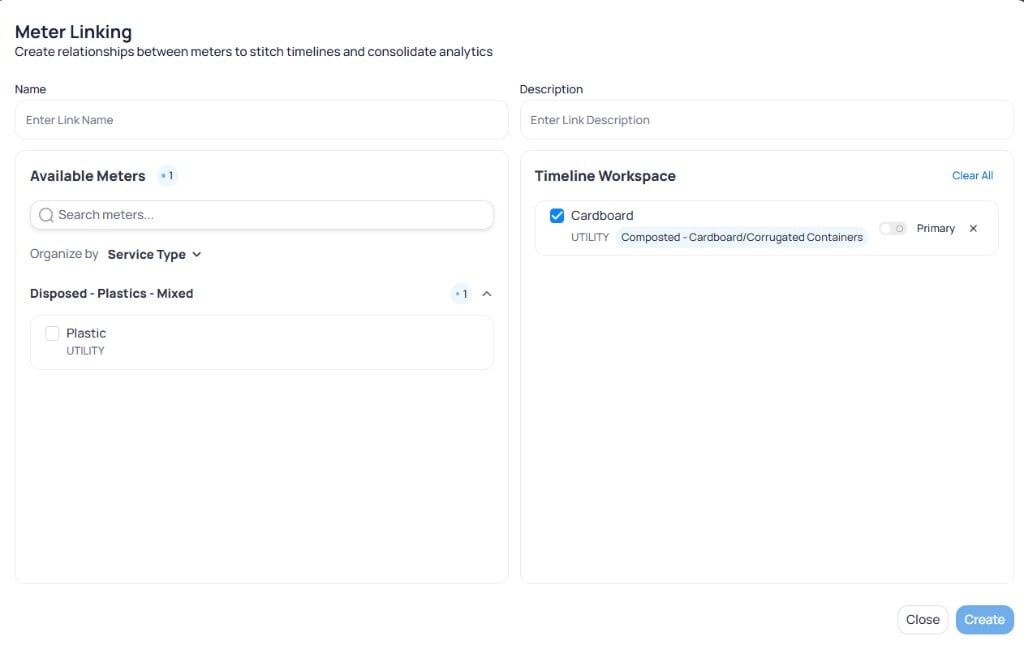
Meter Linking modal before meters are added to the workspace
Enter a name and description
Select two meters
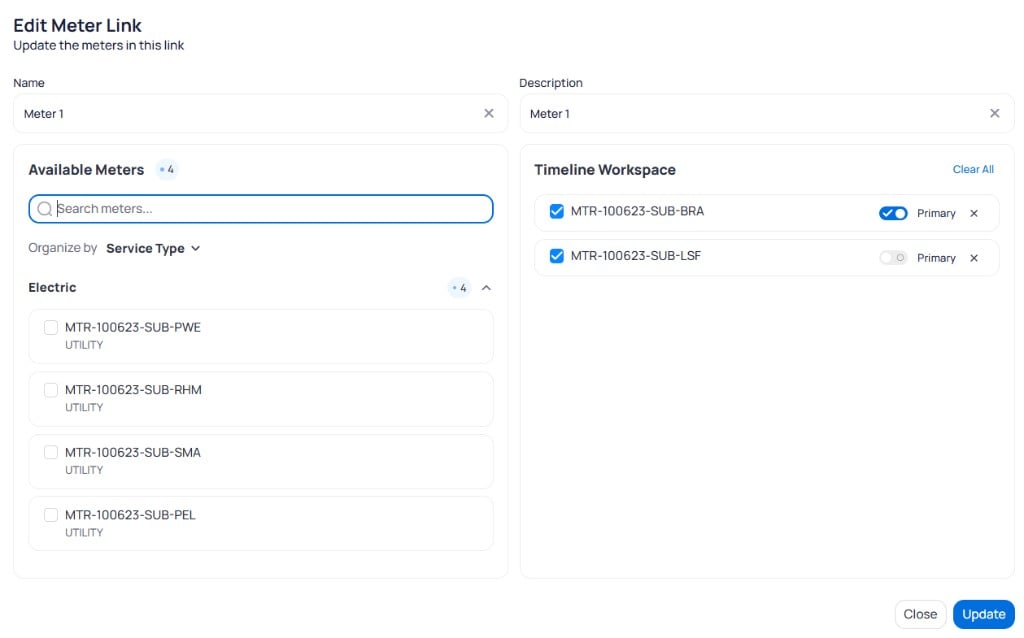
Meter Linking workspace with meters selected and a primary meter designated
Choose the primary meter
Click Create
Create. A success message confirms the link. The new row appears on the Linked Meters table.