

Work Order View
SelectWork Order View in the FDD sidebar to access the Generated Work Orders page. This page lists every work order that FDD has created across all routines.
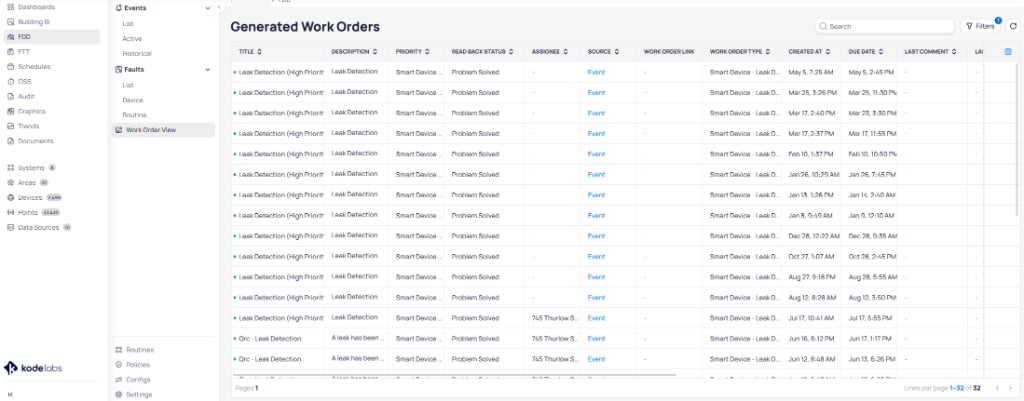
The Generated Work Orders page lists all work orders with sortable columns and filters
Use the search bar and
Filters button to narrow results by any column value.
Work order details
Select a work order row to open the details panel on the right side. The panel displays all metadata for the selected work order.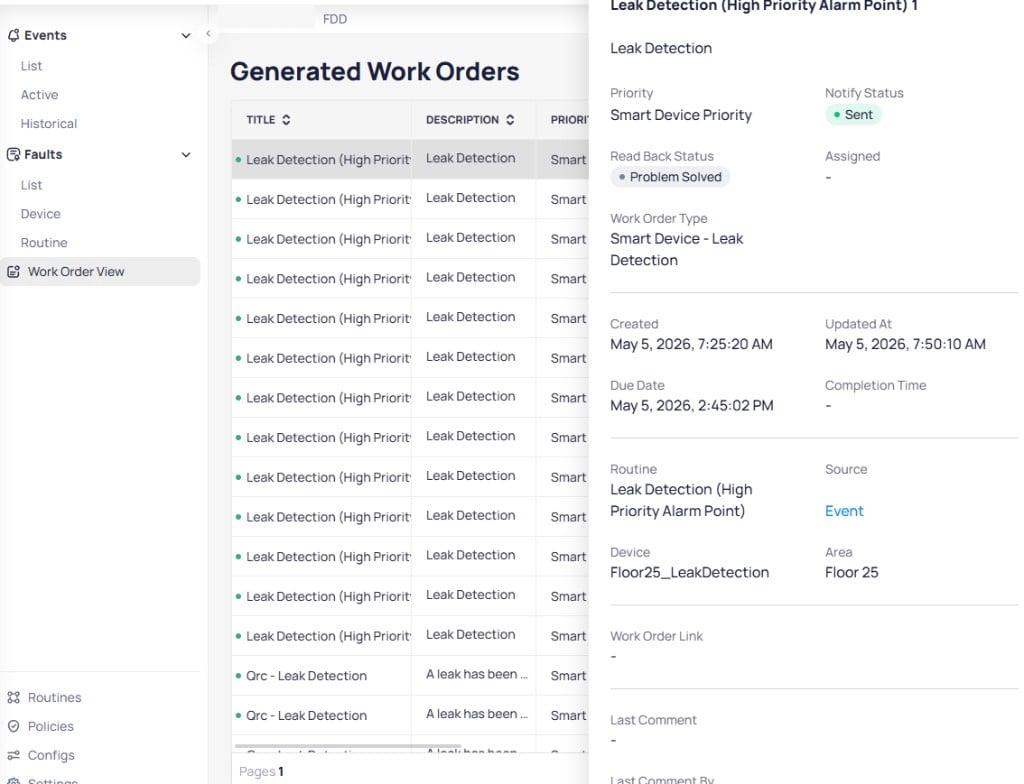
Select a work order to view its full details in the side panel
Work orders in event reports
When you open an event report, the Work Order panel on the right side shows all work orders generated for that event. Each work order card displays its creation time, notify status, last update, sub status, and the full CMMS field mapping.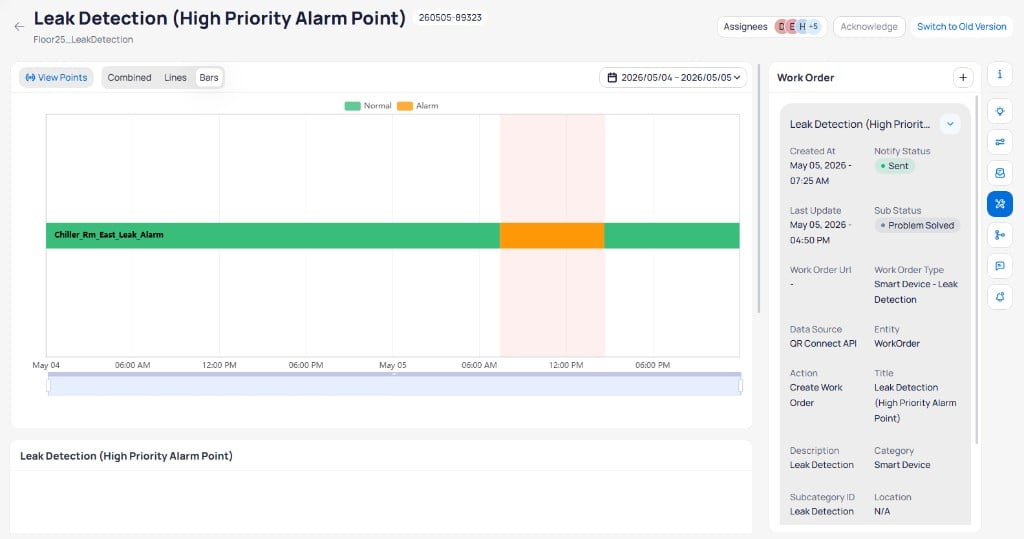
The event report displays work order details alongside the fault timeline
Generate a work order from an event
You can manually generate a work order directly from an event report. This is useful when an event does not have a pre-configured external source or when you need to create an additional work order. To create one work order for each of several events from the Events list, see Create work orders per event.1
Open the event report
Navigate to the event and open its report. The Work Order panel appears on the right side.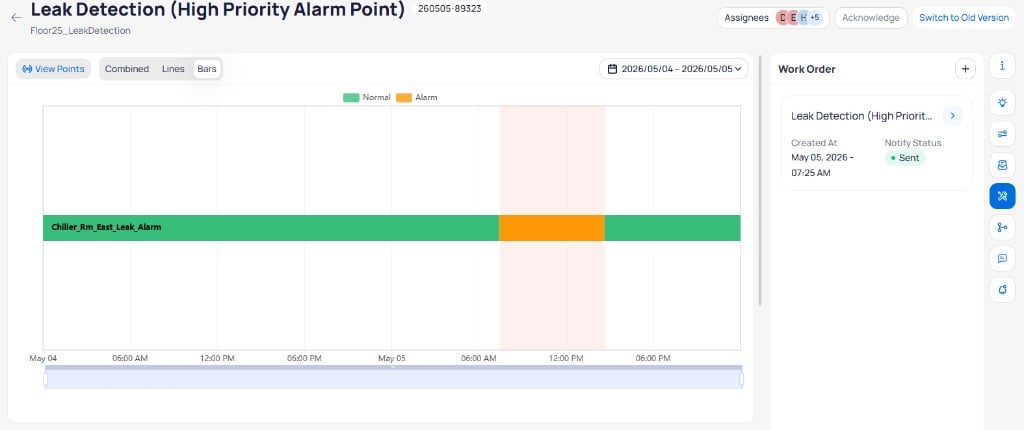
2
Add a work order
Select the 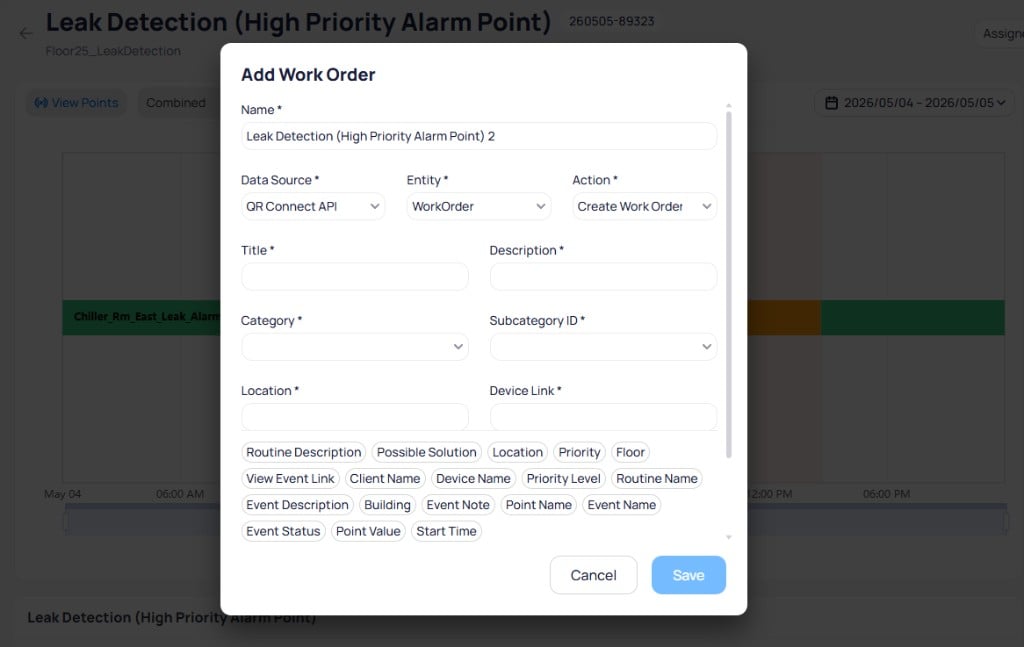
+ button in the Work Order panel header. The Add Work Order dialog opens with fields for your CMMS integration.Name— a descriptive name for the work orderData Source— your CMMS system (for example, QR Connect API)Entity— the entity type (for example, WorkOrder)Action— the action to perform (for example, Create Work Order)TitleandDescription— the work order title and descriptionCategoryandSubcategory ID— classification fields for your CMMSLocationandDevice Link— location and device reference
3
Save the work order
Select
Save to generate the work order. The new work order appears in the Work Order panel and is sent to your CMMS system.Create work orders per event
From the Events list, select multiple events and useCreate Work Order to create one individual work order per event. You can submit the batch as-is or step through each form before sending.
Batch-created work orders appear in the Work Order View alongside work orders created from a single event report. For the full multi-select flow, readiness statuses (To Be Completed, Ready, Sent, Not Sent), Send Work Orders versus Review Each, and retry of incomplete items, see Create work orders per event.
Configure work order integration
Work order integration is configured through the External Data Source section in the FDD configuration page. You can also set an external data source on a notification policy. A policy-level source applies to all configurations that use that policy. A configuration-level source overrides the policy for that configuration only. You add an external source to a routine’s configuration folder, and FDD automatically generates work orders whenever that routine triggers an event.1
Open the routine configuration
Navigate to 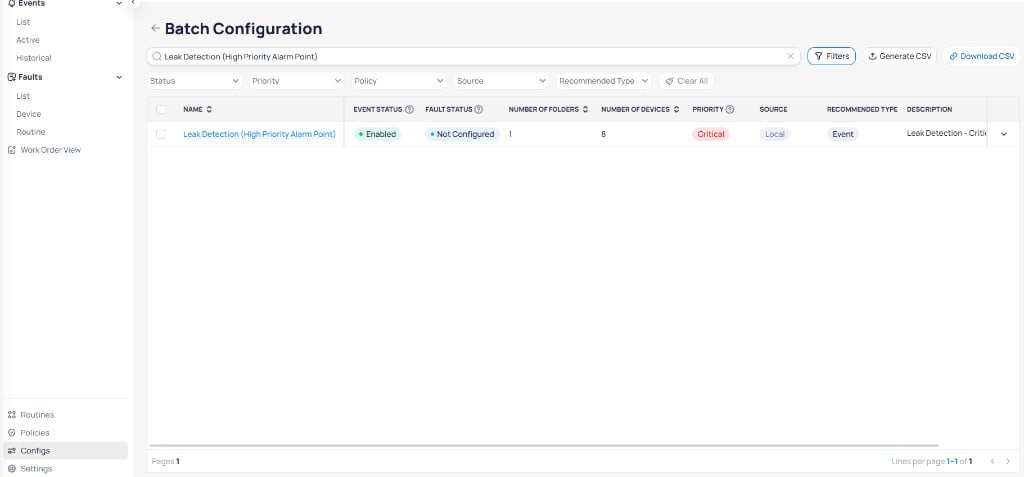
FDD > Configs and select the routine you want to configure. You can search for the routine name in the Batch Configuration list.2
Navigate to External Data Source
Select the routine name to open the detailed configuration page. In the right panel, locate the 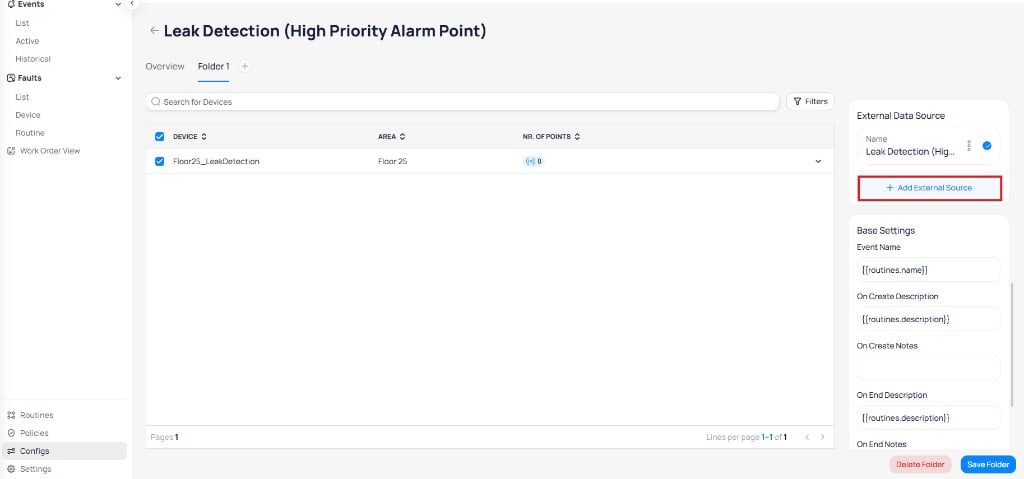
External Data Source section. Select + Add External Source to open the configuration dialog.3
Configure the external source
Fill in the required fields in the Add External Source dialog. Each field maps to a corresponding field in your CMMS system.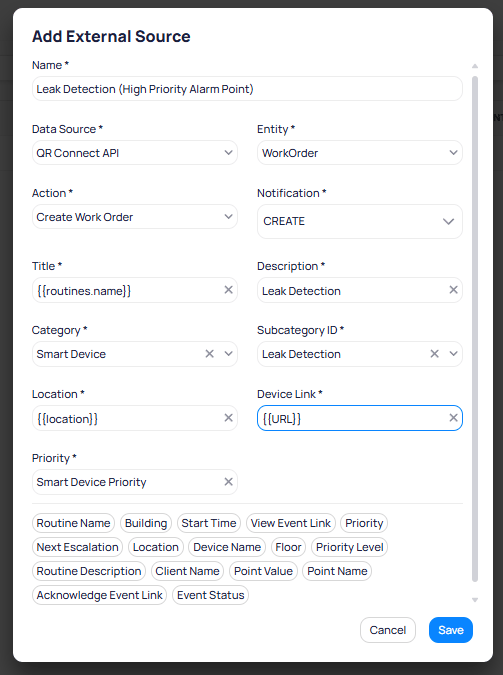
Field
A descriptive name for the external source configuration.
Dropdown
The CMMS system to send work orders to (for example, QR Connect API).
Dropdown
The entity type in the CMMS system (for example, WorkOrder).
Dropdown
The action to perform when an event triggers (for example, Create Work Order).
Dropdown
The notification type to send to the CMMS system (for example, CREATE).
Field
The work order title. Use dynamic variables like
{{routines.name}} to populate automatically.Field
A description of the work order.
Dropdown
The work order category in the CMMS system (for example, Smart Device).
Dropdown
The subcategory identifier (for example, Leak Detection).
Field
The location for the work order. Use
{{location}} to populate dynamically.Field
A link to the device in Cloud BMS. Use
{{URL}} to populate dynamically.Field
The priority level for the work order in the CMMS system.
Select
Save to create the external source.4
Save the configuration
Select
Save Folder to save the configuration.Manage external sources
After creating an external source, it appears in the External Data Source section with a status indicator. Select the three-dot menu on an existing source to edit or delete it.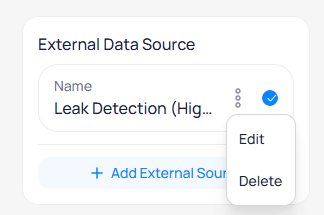
Select the three-dot menu on an external source to edit or delete it
Automatic vs. manual work orders — An external source on the routine creates a work order when FDD generates an event. You can also create a work order manually from an existing event. Closing the event in KODE OS does not close the work order. Close the work order in the connected CMMS; its read-back status then updates in KODE OS.
Next steps
Events
Monitor and investigate real-time fault events across your building equipment.
FDD configuration
Configure routines, set thresholds, and assign priorities for your site.
Notification policies
Control how FDD delivers alerts through email, SMS, push, and phone calls.