

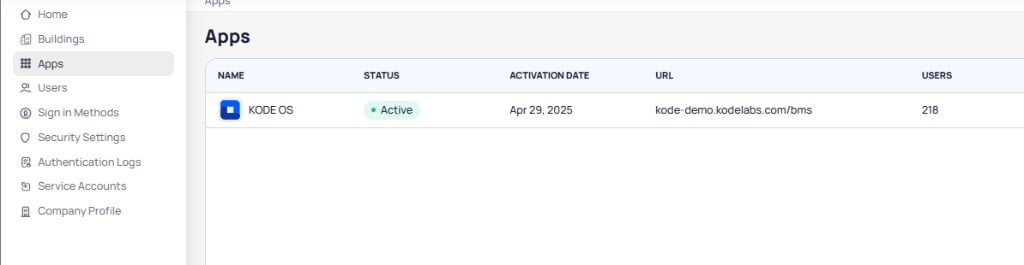
The Apps page displays KODE OS with its status, activation date, URL, and user count
Details
This section provides an overview of KODE OS for your organization and the products enabled across your building portfolio. Use the Details section to:- View KODE OS application information
- View which products are enabled for your organization
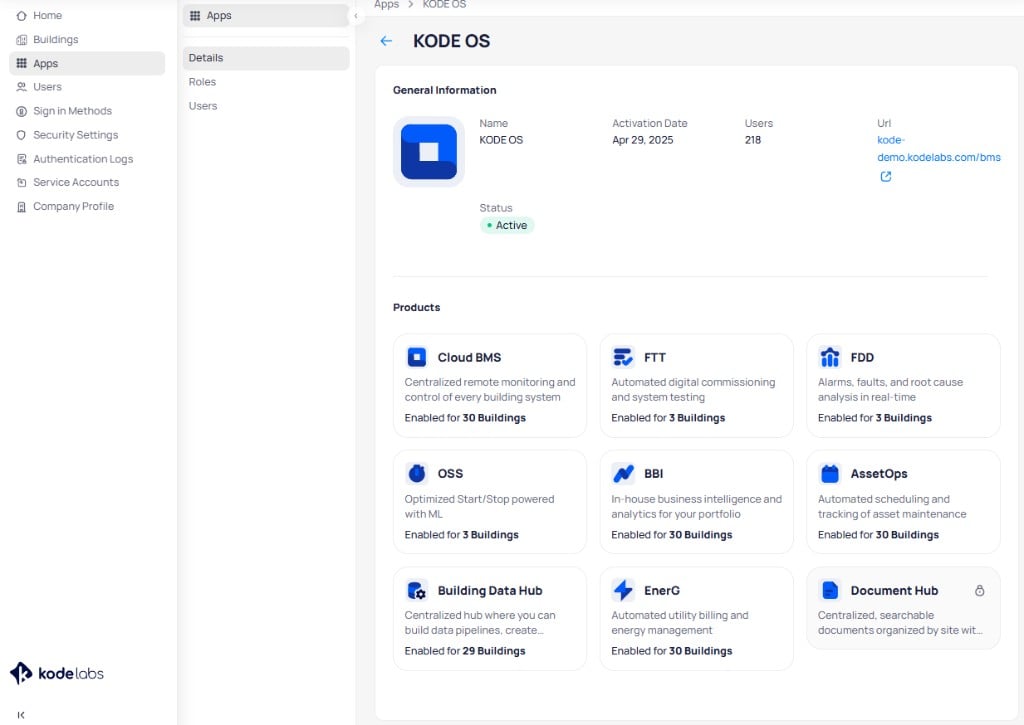
The KODE OS Details section shows application information and enabled products with building counts
Roles
This section lists the KODE OS roles in your organization. You can create roles and define per-product Read and Write permissions for each role. Use the Roles section to:- View all KODE OS roles
- Create new roles and edit or delete existing ones
- Define per-product permissions for each role
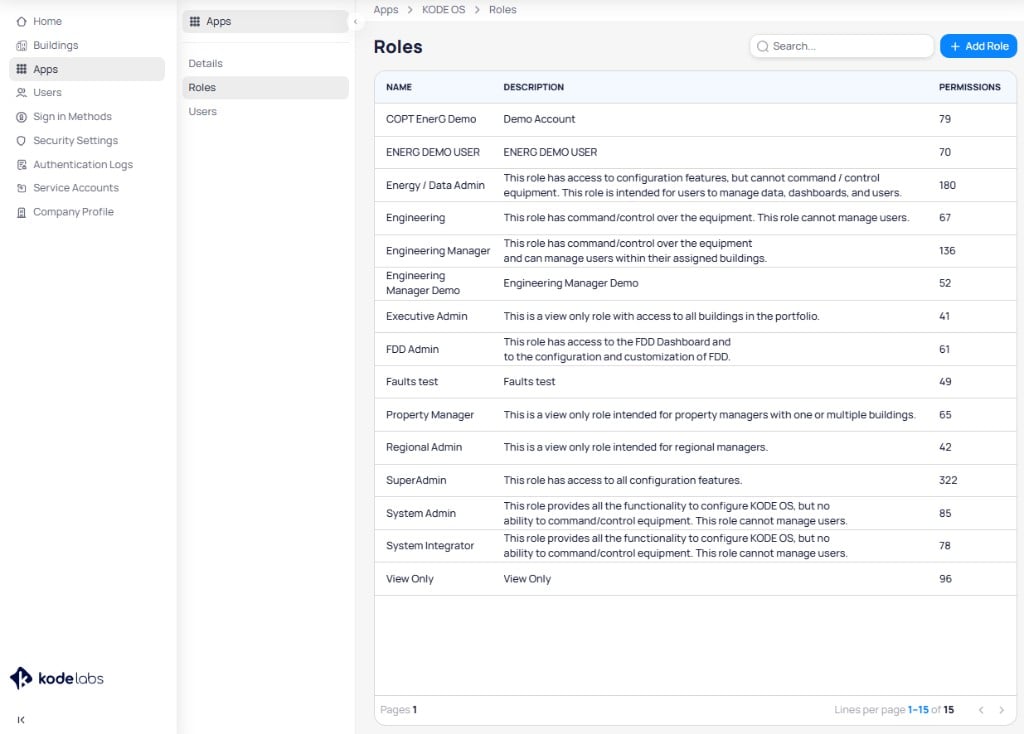
The Roles page lists all KODE OS roles with their name, description, and number of permissions
Users
This section lists users in your organization and shows their KODE OS access and assigned role. You can assign KODE OS to users and change their role from here. Use the Users section to:- View which users have KODE OS access
- View or change the role assigned to each user
- Assign KODE OS to users who do not have access yet
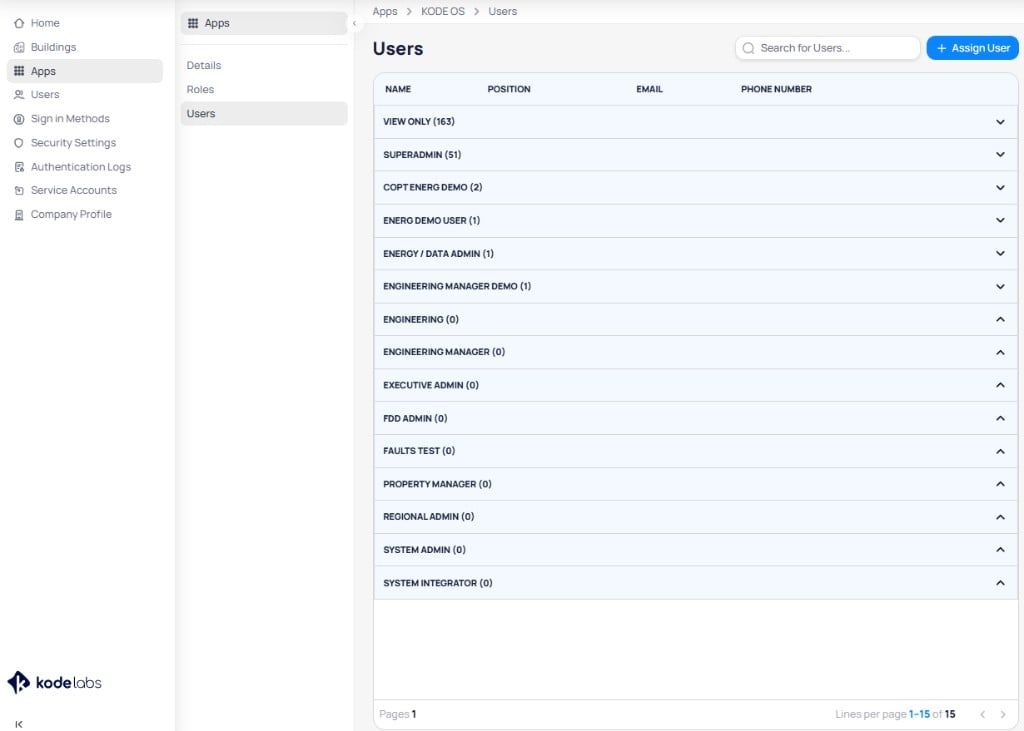
The Users page groups users by their assigned KODE OS role, with expandable sections for each role
KODE OS roles
KODE OS uses Role-Based Access Control (RBAC) to govern what each user can access. Instead of assigning permissions individually to each user, you assign permissions to roles. Users then inherit those permissions based on the role assigned to them. A role defines permissions at the product level, letting you scope access to specific capabilities without granting full access to every product.KODE OS role assigned to them at a time.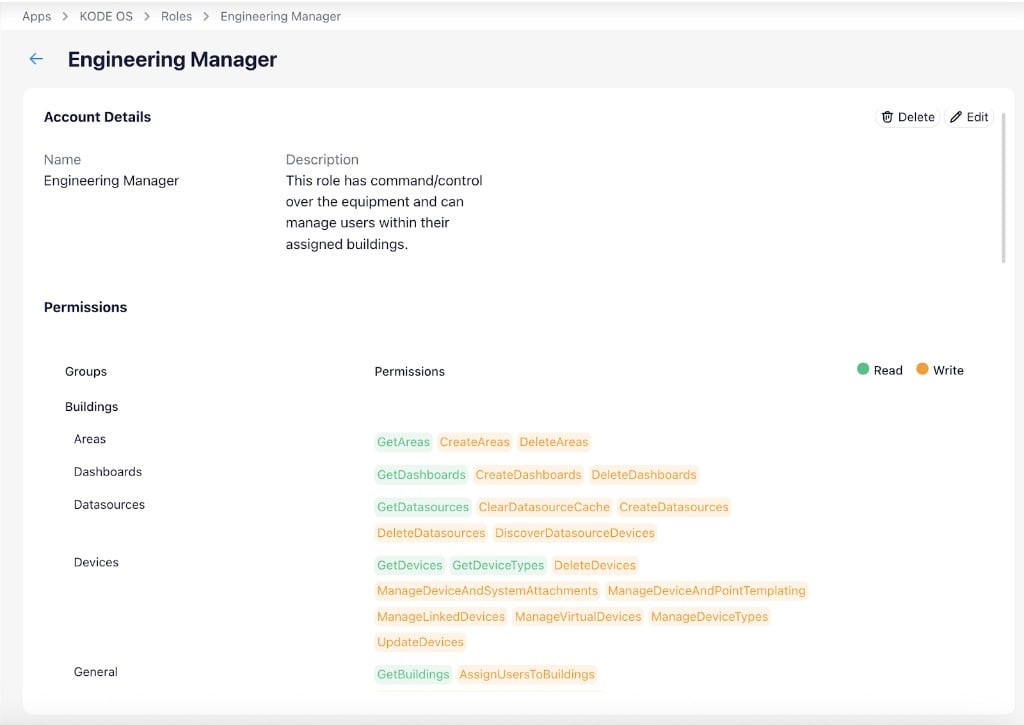
A role detail page shows account details and a permissions table with color-coded Read and Write indicators per group
- Example 1
- Example 2
Permission structure
Permissions are organized into modules and submodules that correspond to KODE OS product areas. Each submodule supports two permission types:- Read — enables users to view information or access specific features within a module (shown in green in the role editor)
- Write — grants users the ability to modify, create, or delete data and configurations within a module (shown in orange in the role editor)
Building BI
Building BI
Building Data Hub
Building Data Hub
Buildings
Buildings
Maintenance
Maintenance
Modules
Modules
Users
Users
Create KODE OS roles
Follow the steps outlined below to create a newKODE OS role.
Open KODE OS in Apps
Go to the Roles page
Create a new role
+Add Role to start creating a new role.Configure role details
Copy From Another Role to base the new role on an existing one and modify the permissions as needed.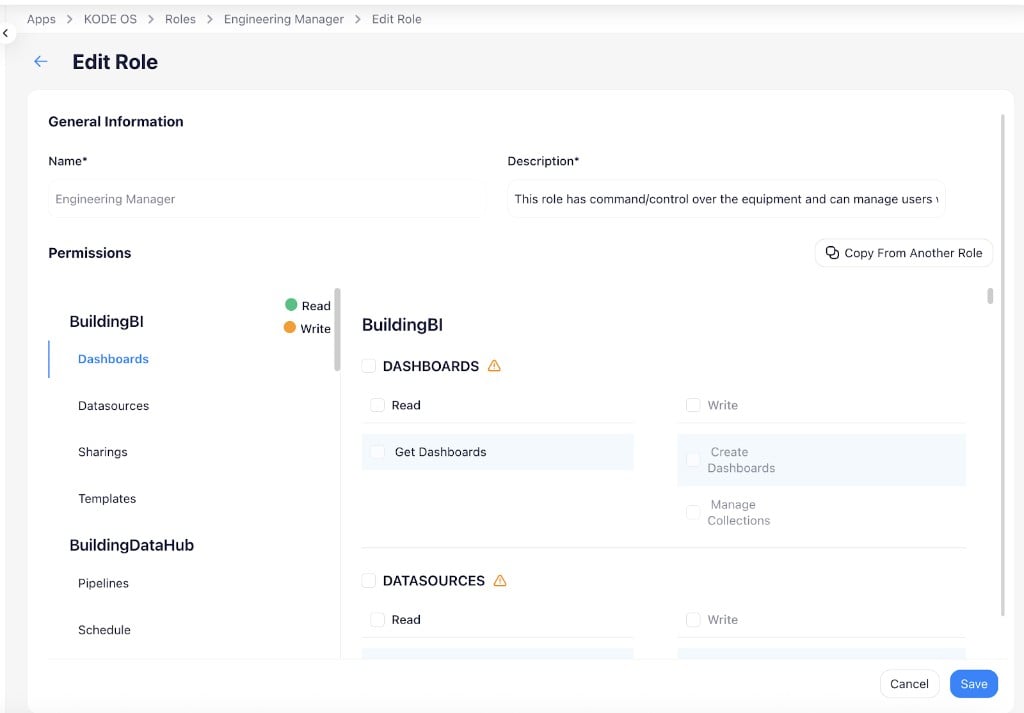
The role editor shows General Information, a Copy From Another Role option, and per-product permissions with Read and Write checkboxes
Save the role
Edit KODE OS roles
To edit an existing role:Select the role
Click Edit
Edit to open the role editor. Modify the name, description, or permissions as needed.Save changes
Save to apply the changes. Click Cancel to discard them.Delete KODE OS roles
To delete a role, select it from the Roles page and clickDelete on the role detail page. Confirm the deletion in the dialog.
Assign KODE OS roles
Follow the steps outlined below to assign KODE OS and a role to a user.Open KODE OS in Apps
Go to the Users page
Assign a KODE OS role to a user
+Assign User, select the users, and click +Assign User(s) to confirm.Configure user management permissions
You can control which roles are allowed to manage users in KODE OS by configuring the Users > General permissions within a role. This determines who can view, create, assign, and delete users, and optionally restricts those actions with constraints.Open the role editor
Edit.Navigate to Users permissions
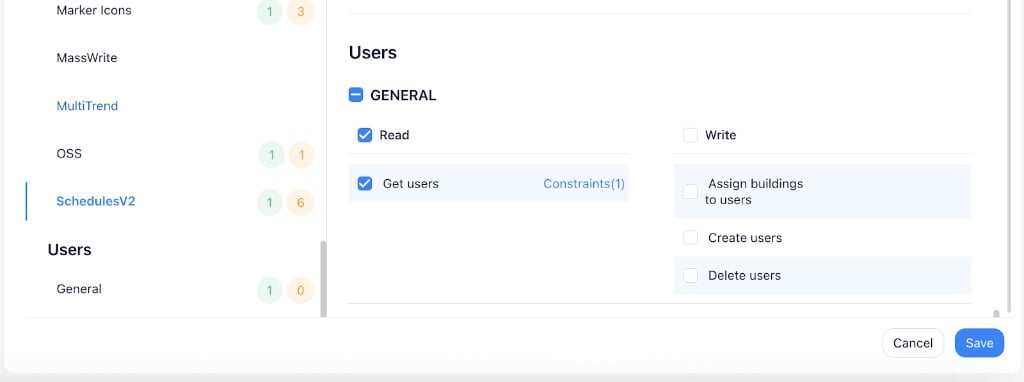
The Users > General permissions section provides Read and Write controls for user management within KODE OS
Configure Read permissions
Constraints to restrict visibility to users assigned to the same buildings.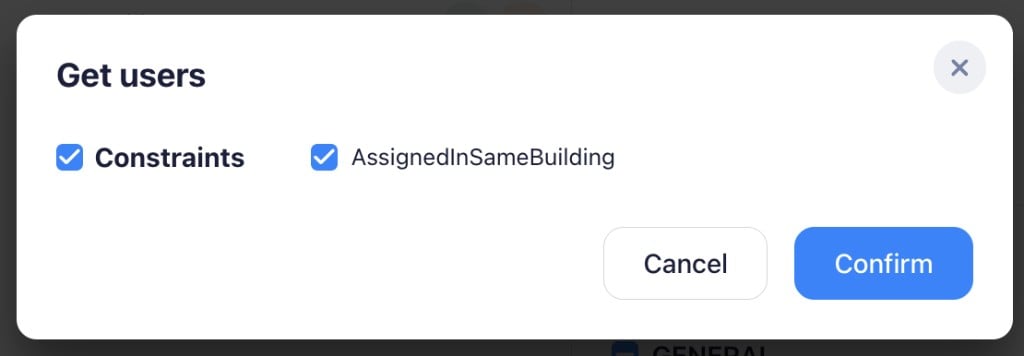
The Get users constraint limits visibility to users assigned to the same building
Configure Write permissions
Manage Constraints link.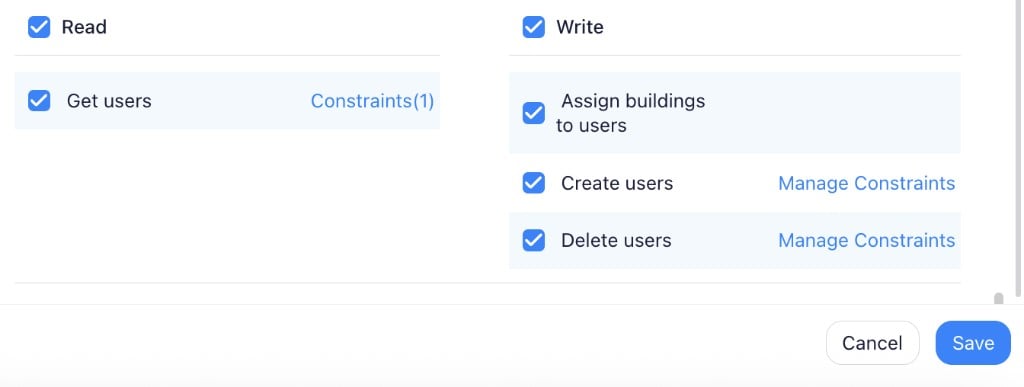
Write permissions control user creation, deletion, and building assignment, with optional constraints for each
Manage Constraints to restrict which roles the created users can have.Manage Constraints to restrict which roles can be deleted.Set role constraints (optional)
Manage Constraints to specify which roles the current role is allowed to create or delete. Select the AllowedRoles constraint and choose the permitted roles from the dropdown.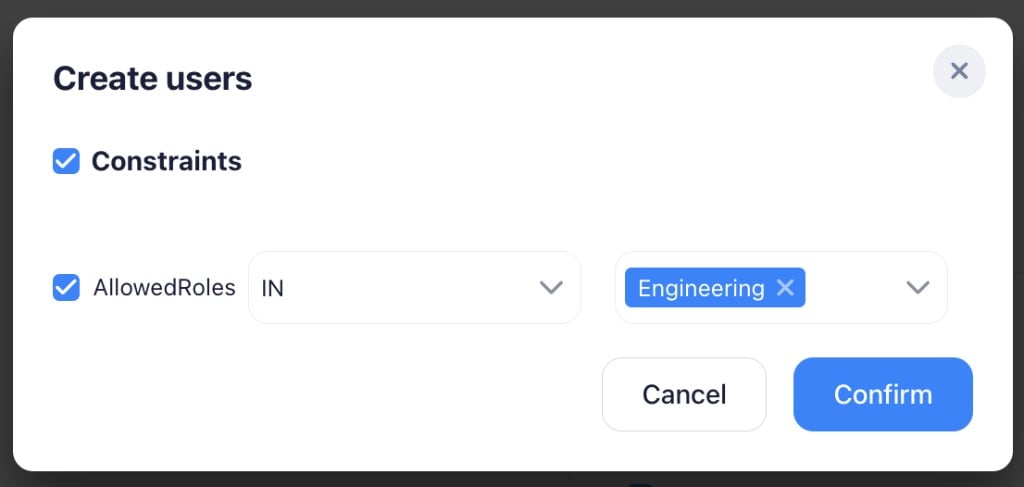
The Create users constraint restricts which roles this role can assign to new users
Save
Save to apply the user management permissions for this role.Role constraints
Beyond Read and Write permissions, KODE OS roles can include constraints that limit scope and visibility. Constraints appear next to eligible permissions in the role editor. Common constraint examples include:AssignedInEvent constraint. Keep it enabled to limit acknowledgment to users assigned through the event’s notification policy. Disable it for a role that needs to acknowledge any FDD event the user can access, including historical events without an assignee.
To change the constraint, open Apps > KODE OS > Roles and edit the role. Find Acknowledge FDD events and click Manage Constraints. Select or clear AssignedInEvent, then click Confirm and save the role.
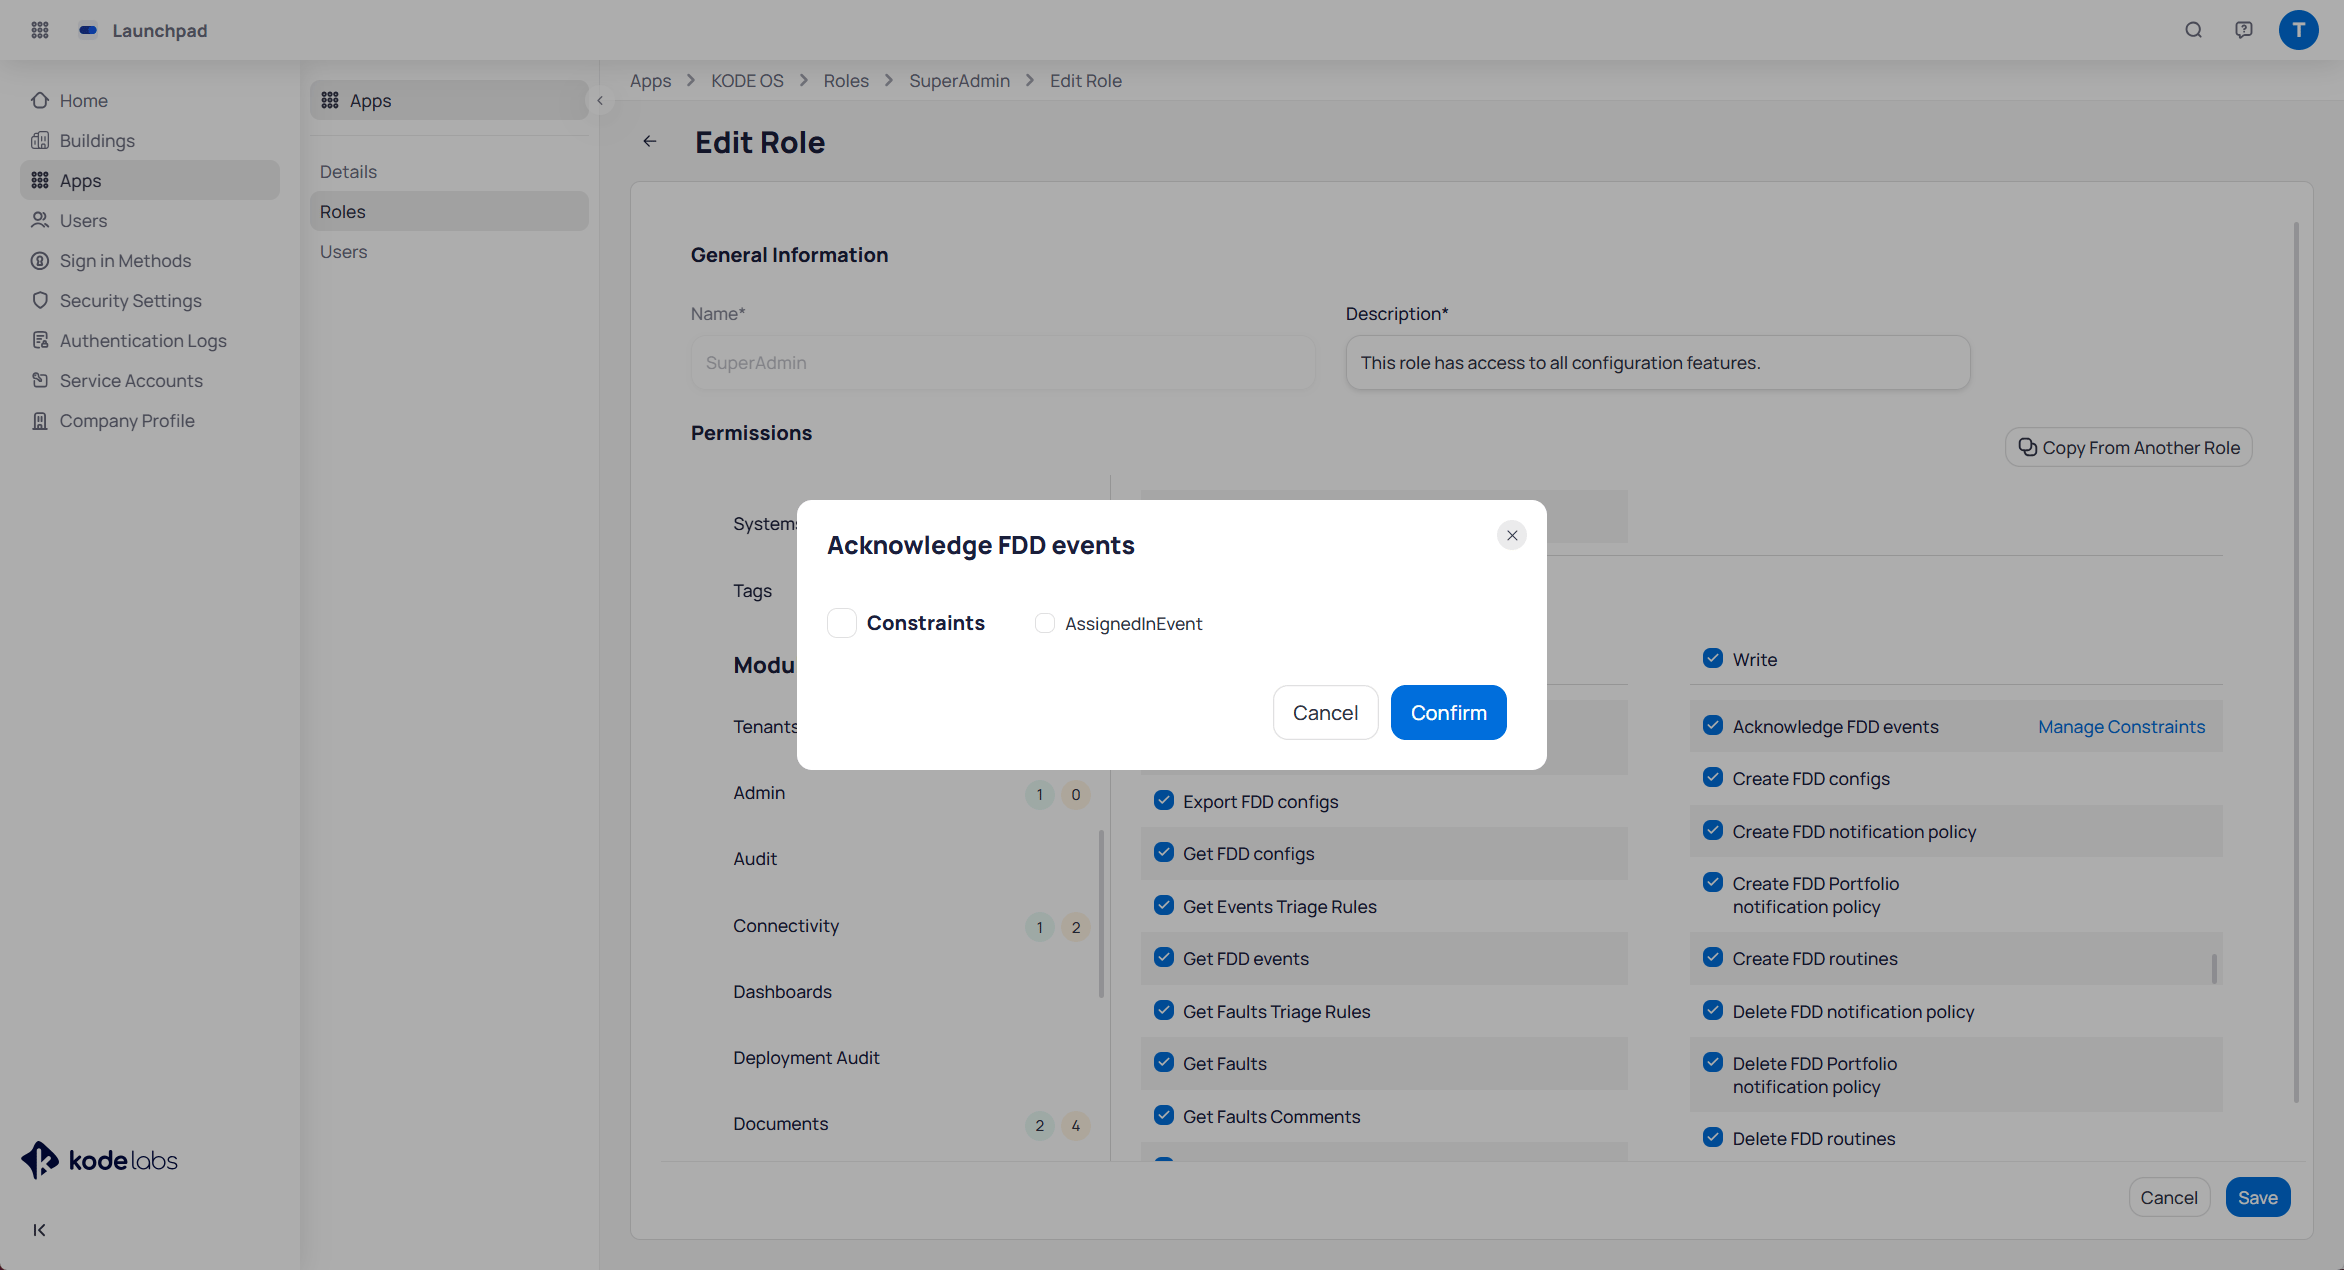
Manage Constraints on Acknowledge FDD events opens the AssignedInEvent constraint